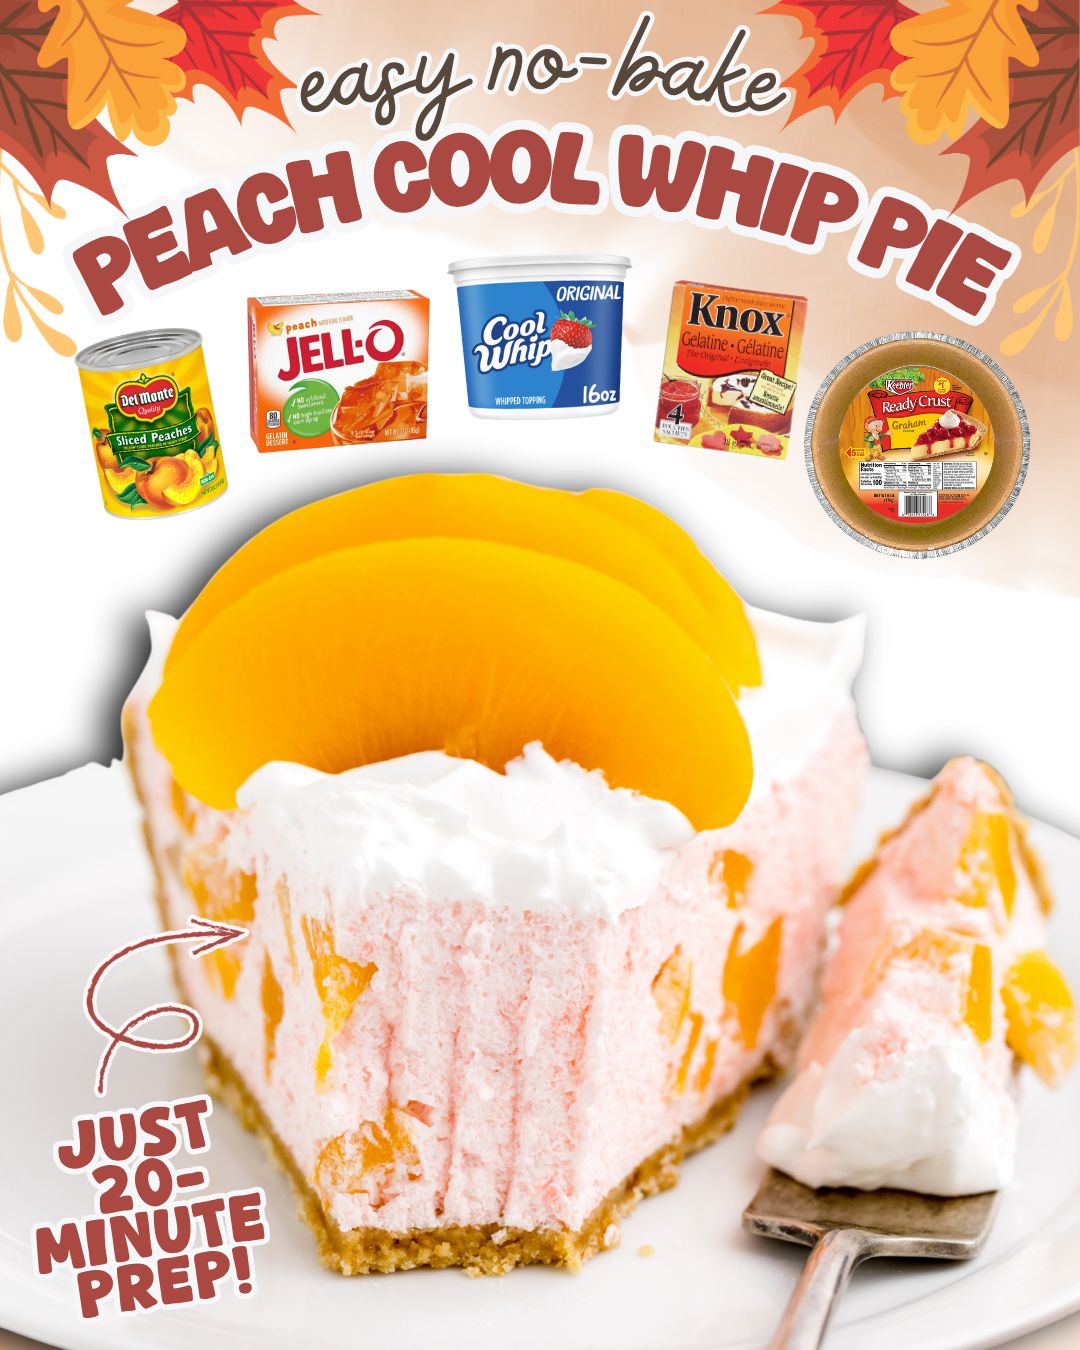
This no-bake pie comes together in just a few simple steps. Proper mixing and chilling are key to
achieving the perfect texture.
Step 1: Prepare the Gelatin Base
In a medium mixing bowl, combine the instant peach gelatin and the unflavored gelatin. Pour in the
boiling water and stir thoroughly until both gelatin powders are completely dissolved. This step is
important to ensure a smooth filling without grainy texture.
Step 2: Add Cold Water
Stir in the cold water and mix well. This helps cool the gelatin mixture slightly and prepares it for
the next step. Allow the mixture to sit for a few minutes until it thickens just slightly but is not
fully set.
Step 3: Fold in Cool Whip
Gently fold the thawed Cool Whip into the gelatin mixture using a spatula. Mix slowly and carefully to
maintain the airy texture. Continue folding until the mixture is smooth, fluffy, and evenly combined.
Step 4: Add the Peaches
Chop the drained sliced peaches into smaller pieces if desired, then gently fold them into the filling.
Distribute the fruit evenly so each slice of pie contains plenty of peach flavor.
Step 5: Fill the Crust
Spoon the peach filling into the pre-made graham cracker crust. Smooth the top with a spatula to create
an even surface. Lightly tap the pie on the counter to remove any air pockets.
Step 6: Chill Until Set
Place the pie in the refrigerator and chill for at least 2–3 hours, or until fully set. The pie should
feel firm to the touch and hold its shape when sliced.
Serving and Storage:
Peach Cool Whip Pie is best served chilled. Use a sharp knife dipped in warm water for clean slices.
This dessert pairs beautifully with fresh fruit, a dollop of extra whipped topping, or a light drizzle
of peach syrup for added presentation.
For storage, cover the pie loosely with plastic wrap or place it in an airtight container. It can be
stored in the refrigerator for up to three days while maintaining its texture and flavor. Avoid leaving
the pie at room temperature for extended periods, as the filling may soften.
This pie can also be frozen for a firmer, icebox-style dessert. Freeze for up to one month, then thaw
slightly in the refrigerator before serving.
Tips:
- Drain peaches thoroughly to prevent excess liquid from thinning the filling.
- Fold ingredients gently to keep the pie light and fluffy.
- Chill the pie on a flat surface to ensure even setting.
- For extra flavor, garnish with fresh peach slices before serving.
- Make the pie a day ahead for stress-free entertaining.
These simple tips help guarantee a smooth, stable pie with the best possible texture and flavor.
Conclusion:
Peach Cool Whip Pie is proof that delicious desserts don’t have to be complicated. With its soft,
cloud-like filling and bright peach flavor, this no-bake pie delivers comfort and freshness in every
bite. It’s an ideal dessert for summer gatherings, last-minute guests, or anytime you crave something
sweet and light.
Easy to prepare and universally appealing, this recipe is one you’ll want to save and return to again
and again. Once you’ve made it, it’s sure to become a favorite in your dessert collection.
FAQ:
Can I use fresh peaches instead of canned?
Yes, but they should be peeled, finely chopped, and well-drained to avoid excess moisture.
Does this pie need baking?
No, this is a completely no-bake recipe, making it quick and convenient.
Can I use homemade whipped cream?
Cool Whip is recommended for stability, but stabilized whipped cream can be used as an alternative.
How long does it take to set?
The pie typically sets within 2–3 hours in the refrigerator.
Can I make this dessert ahead of time?
Yes, it’s an excellent make-ahead dessert and can be prepared the day before serving.
