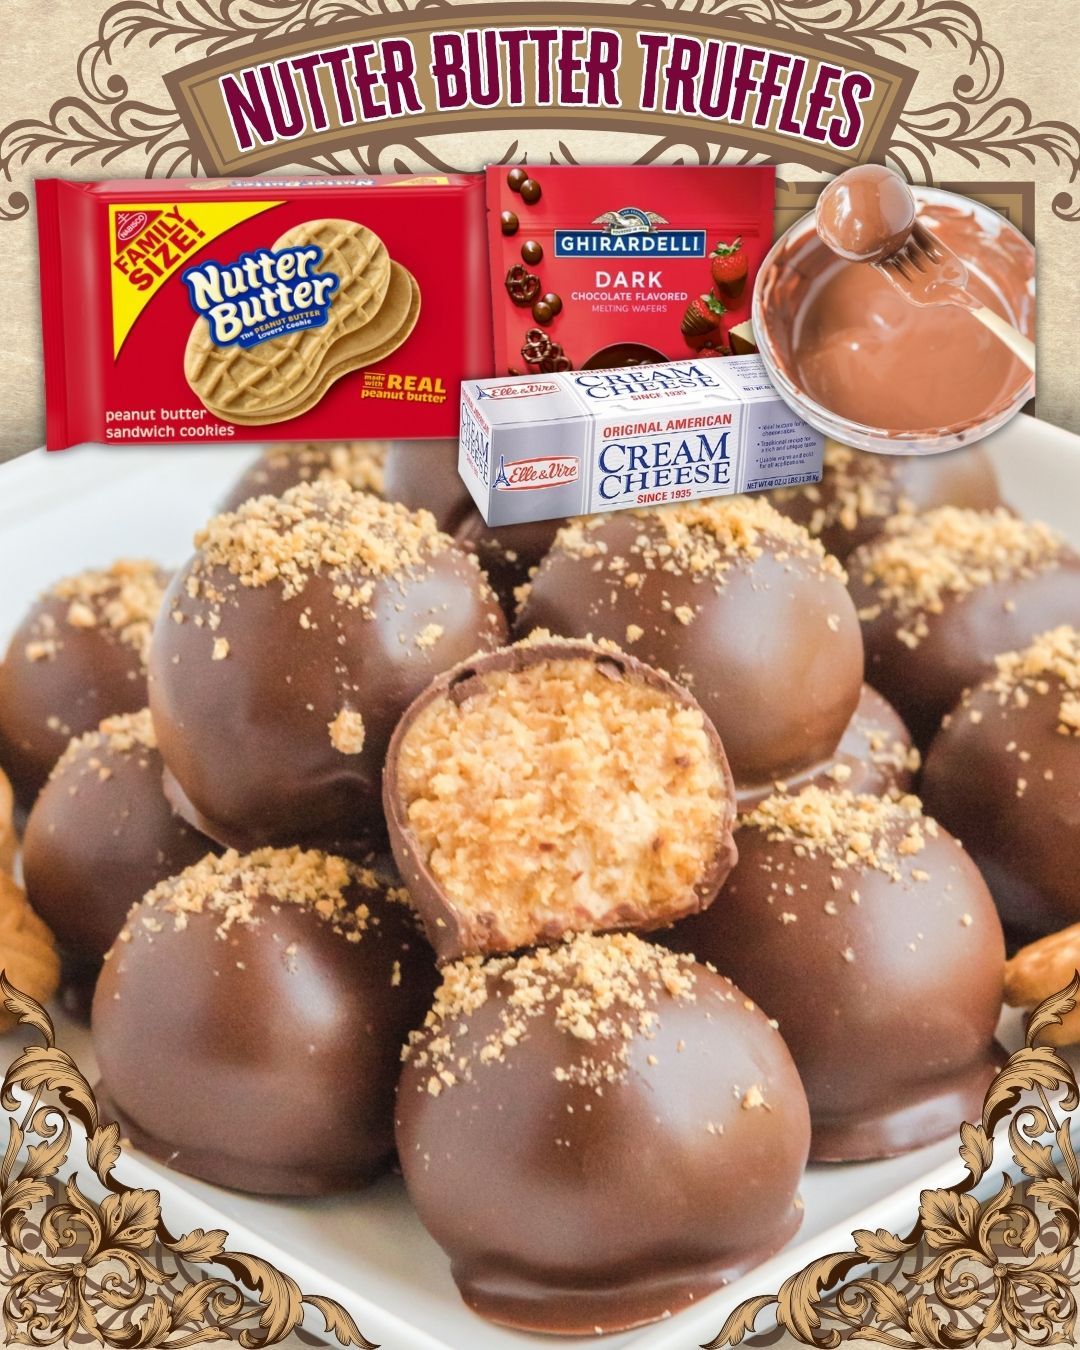
- Crush the Nutter Butter cookies: Place the Nutter Butter cookies in a food processor and pulse until they are finely crushed. You can also crush them by hand using a ziplock bag and a rolling pin if you don’t have a food processor.
- Mix the filling: In a large bowl, combine the crushed Nutter Butter cookies with the softened cream cheese and vanilla extract. Use a hand mixer or a spatula to mix everything together until fully combined. The mixture should be thick and slightly sticky.
- Shape the truffles: Use your hands to roll the mixture into small, bite-sized balls, about 1 inch in diameter. Place them on a baking sheet lined with parchment paper or wax paper. Once all the truffles are shaped, place the sheet in the fridge to chill for about 30 minutes, or until firm.
- Melt the chocolate: While the truffles are chilling, melt the chocolate wafers. You can do this by microwaving them in 30-second intervals, stirring between each, until smooth and fully melted. Alternatively, you can melt the chocolate over a double boiler on the stove.
- Coat the truffles: Once the truffles are firm, use a fork or a toothpick to dip each truffle into the melted chocolate. Roll the truffle in the chocolate until it is completely coated, then place it back on the parchment paper to set. Repeat with all the truffles.
- Let the chocolate set: Allow the chocolate coating to harden at room temperature or place the truffles in the fridge for 15-20 minutes to speed up the process.
- Serve and enjoy: Once the chocolate has set, your Nutter Butter Truffles are ready to serve! You can store them in an airtight container for up to 1 week, though we doubt they’ll last that long!
Serving and Storage
These Nutter Butter Truffles are perfect for sharing with friends, family, or as a treat for yourself. Here’s how to store and serve them:
- Serving: Serve these truffles chilled or at room temperature for the best taste and texture. They make a great addition to any dessert platter or party spread.
- Storage: Store the truffles in an airtight container in the fridge for up to 1 week. They’ll stay fresh and delicious, ready to be enjoyed at any time!
Tips
Here are a few tips to help you make the perfect Nutter Butter Truffles:
- Chill the mixture: If you find the truffle mixture too sticky to shape, chill it in the fridge for 10-15 minutes before rolling. This makes it easier to handle and roll into balls.
- Customize the chocolate coating: Use different types of chocolate for the coating — milk chocolate, dark chocolate, or even white chocolate for a fun twist. You can also sprinkle the truffles with crushed Nutter Butter crumbs or crushed peanuts for extra texture.
- Make them mini: For bite-sized treats, roll smaller truffles that are about ¾ inch in diameter. These are great for parties or snackable portions.
- Get creative with toppings: After dipping the truffles in chocolate, you can drizzle them with more melted chocolate or sprinkle them with toppings like sea salt, mini chocolate chips, or chopped nuts for added flavor and presentation.
Variations
If you want to try different versions of Nutter Butter Truffles, here are a few fun variations:
- Nutty Nutter Butter Truffles: Roll the truffles in chopped peanuts or crushed almonds after dipping them in chocolate for an extra crunchy, nutty twist.
- Chocolate Drizzle Nutter Butter Truffles: After coating the truffles in chocolate, drizzle them with a contrasting chocolate (like white chocolate on milk chocolate) to add a decorative touch and extra flavor.
- Peanut Butter Cup Truffles: Mix in mini peanut butter cups into the truffle filling for an even richer, peanut butter-packed treat.
- Dark Chocolate Nutter Butter Truffles: Use dark chocolate melting wafers instead of milk chocolate for a more intense and slightly bitter chocolate flavor that pairs wonderfully with the sweet peanut butter filling.
Conclusion
Nutter Butter Truffles are the ultimate treat for peanut butter lovers! With just a few simple ingredients, these rich, creamy, and indulgent truffles are quick and easy to make — and they’re guaranteed to satisfy any sweet tooth. Whether you’re making them for a party, a gift, or just for yourself, these truffles are sure to be a hit. So grab your Nutter Butter cookies and get ready to make a batch of these irresistible, no-bake truffles that everyone will love!
FAQ
1. Can I use peanut butter instead of Nutter Butter cookies?
While Nutter Butter cookies are perfect for this recipe, you can substitute them with crushed regular peanut butter cookies if you prefer. Keep in mind that the texture might be a little different, but it will still taste amazing!
2. Can I make these truffles ahead of time?
Yes! You can make these truffles ahead of time and store them in the fridge for up to a week. They’re great for meal prepping or preparing for a party or gathering.
3. Can I freeze the truffles?
Absolutely! You can freeze Nutter Butter Truffles for up to 3 months. Just make sure to place them in an airtight container, and layer them with parchment paper to prevent sticking. Let them thaw at room temperature for a few minutes before serving.
4. How do I make the chocolate coating smooth and glossy?
For a smooth, glossy finish, make sure to use chocolate melting wafers, and melt them carefully in the microwave or using a double boiler. Stir often and avoid overheating the chocolate to keep it from seizing up.
