Step 1: Prepare the Cheesecake Crust
Start by preheating your oven to 325°F (163°C). In a medium-sized bowl, combine the graham cracker crumbs, sugar, and cinnamon (if using). Stir to combine. Add the melted butter and mix until all the crumbs are moistened.
Press the mixture evenly into the bottom of a 9-inch springform pan. Use the back of a spoon to compact it, ensuring the crust is firm and even. Bake the crust in the preheated oven for about 10 minutes or until lightly golden brown. Allow the crust to cool while you prepare the cheesecake filling.
Step 2: Make the Cheesecake Filling
In a large bowl, beat the softened cream cheese and sugar together using an electric mixer on medium speed until smooth and creamy. Add the vanilla extract and mix until combined. Add the eggs, one at a time, mixing well after each addition.
Next, add the sour cream and flour, beating on low speed until everything is fully incorporated. Pour the cheesecake batter over the cooled crust in the springform pan. Smooth the top with a spatula.
Bake the cheesecake in the oven at 325°F (163°C) for 45-50 minutes, or until the center is slightly set but still jiggles slightly when shaken. Turn off the oven and leave the cheesecake inside for 1 hour to cool gradually. After an hour, remove the cheesecake from the oven and let it cool completely on the counter before placing it in the refrigerator. Chill for at least 4 hours, or overnight for best results.
Step 3: Make the Boston Cream Filling
While the cheesecake is chilling, prepare the Boston Cream filling. In a medium saucepan, combine the whole milk, sugar, and cornstarch. Whisk the mixture over medium heat until it starts to thicken, about 5-7 minutes.
Once the mixture begins to thicken, slowly add the egg yolks while constantly whisking. Continue to cook for an additional 2-3 minutes until the custard is thick enough to coat the back of a spoon.
Remove the saucepan from the heat and stir in the butter and vanilla extract. Set the custard aside to cool to room temperature, then refrigerate until ready to use.
Step 4: Prepare the Chocolate Ganache
To make the chocolate ganache, place the chopped semisweet chocolate in a heatproof bowl. In a small saucepan, heat the heavy cream over medium heat until it just begins to simmer. Pour the hot cream over the chopped chocolate and let it sit for 2-3 minutes.
After the chocolate has softened, stir the mixture until smooth. Stir in the butter for a glossy finish. Let the ganache cool slightly before using it to top the cheesecake.
Step 5: Assemble the Boston Cream Pie Cheesecake
Once the cheesecake has fully chilled and the Boston Cream filling is cooled, carefully spread the Boston Cream filling over the top of the cheesecake, smoothing it out with a spatula. Be sure to leave a small border around the edges.
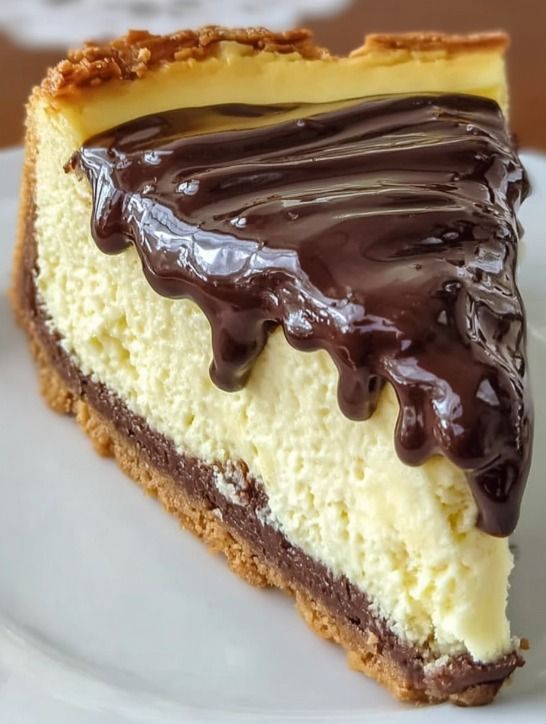
Next, pour the chocolate ganache over the top of the Boston Cream filling, allowing it to gently cascade down the sides of the cheesecake. Refrigerate the cheesecake again for at least 1 hour to allow the ganache to set.
Step 6: Serve and Enjoy
Once the ganache has set, remove the cheesecake from the refrigerator. Run a knife around the edges of the springform pan to release the cheesecake. Slice and serve, enjoying the rich layers of cheesecake, Boston Cream filling, and chocolate ganache. Garnish with whipped cream or fresh berries for an extra touch, if desired.
Serving and Storage
This Retro Bakery-Style Boston Cream Pie Cheesecake can be served as a show-stopping dessert at any gathering. It pairs wonderfully with a cup of coffee or a chilled glass of dessert wine. The cheesecake can be cut into generous slices, making it perfect for sharing with family and friends.
For storage, keep any leftover cheesecake covered in the refrigerator. It will stay fresh for up to 3-4 days. If you want to keep it longer, you can freeze individual slices. Wrap them tightly in plastic wrap and aluminum foil before storing in an airtight container. Frozen cheesecake slices can last for up to 2 months. When ready to serve, thaw in the refrigerator overnight.
Tips
- Make sure the cream cheese is fully softened before starting the recipe to ensure a smooth, lump-free cheesecake filling.
- If you want a thicker crust, simply double the amount of graham cracker crumbs and sugar in the crust recipe.
- For a quicker version, you can use store-bought chocolate ganache instead of making your own.
- When spreading the Boston Cream filling, be gentle to avoid disrupting the cheesecake layer beneath.
- If the ganache is too thick to pour, gently reheat it in the microwave in 10-second intervals until it reaches a pourable consistency.
Conclusion
The Retro Bakery-Style Boston Cream Pie Cheesecake is the perfect marriage of two iconic desserts. Its creamy layers, rich chocolate topping, and buttery crust make it an unforgettable treat for any occasion. By following the steps outlined in this guide, you can recreate this nostalgic dessert in the comfort of your own
