Cherry bars come together in a few simple steps, making them ideal for bakers of all experience levels. Careful layering is key to achieving the perfect bite.
- Preheat the Oven: Set your oven to a moderate baking temperature. Lightly grease or line a baking pan with parchment paper.
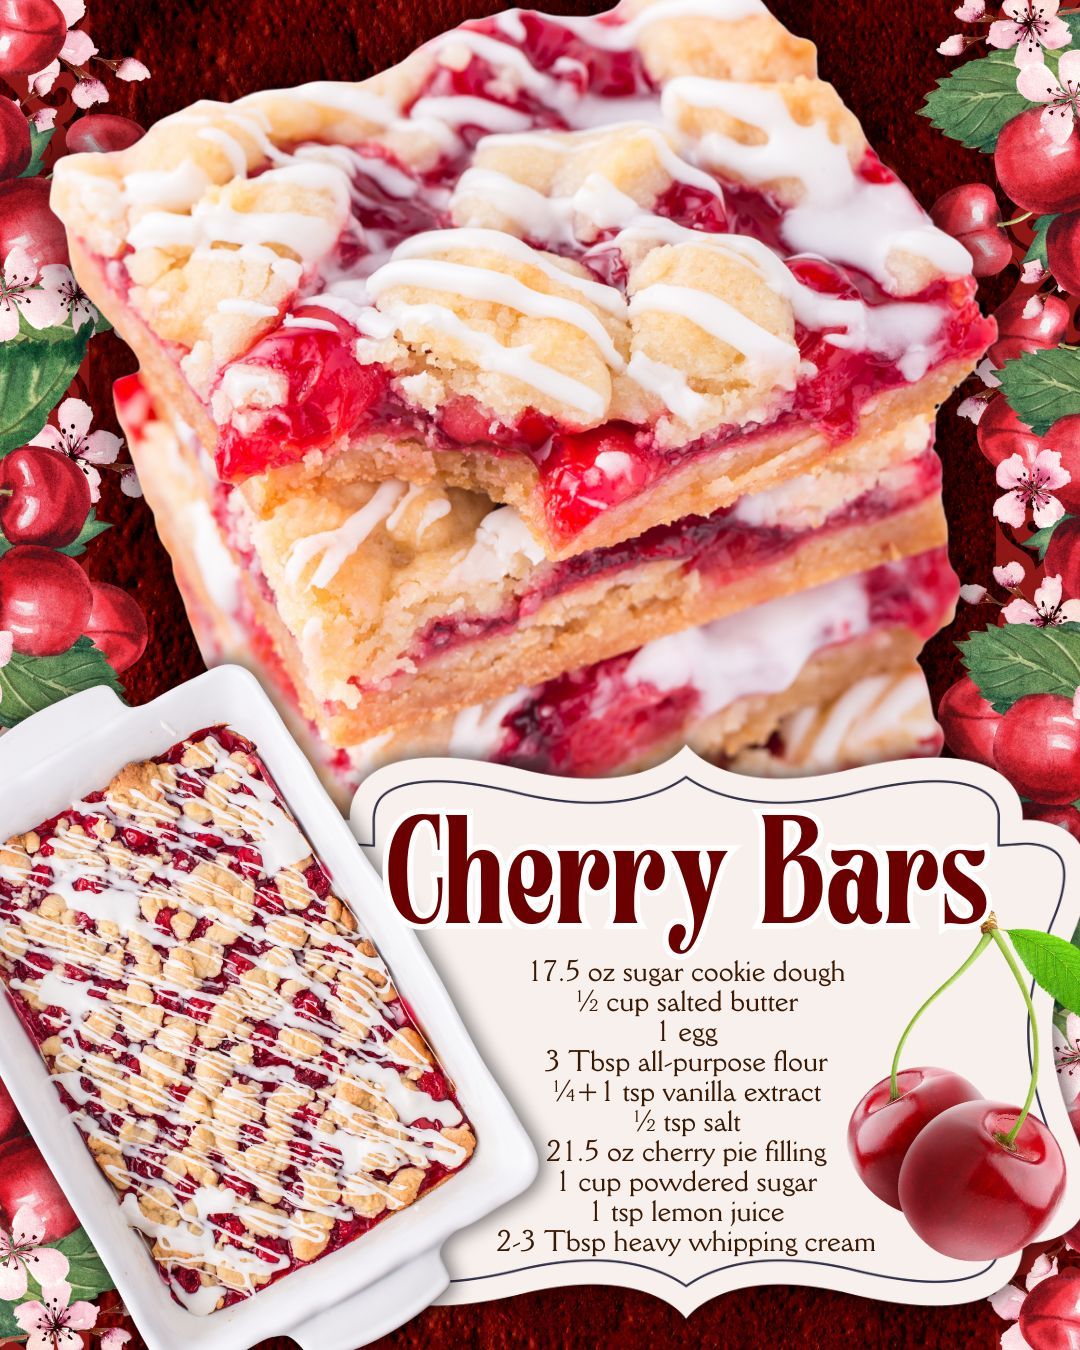
- Prepare the Dough: In a mixing bowl, combine the sugar cookie dough, softened butter, egg, flour, vanilla extract, and salt. Mix until smooth and evenly combined.
- Form the Base: Press about two-thirds of the dough evenly into the bottom of the prepared pan, creating a uniform layer.
- Add the Cherry Filling: Spread the cherry pie filling evenly over the dough base, reaching close to the edges.
- Add the Top Layer: Drop small pieces of the remaining dough over the cherry filling. It does not need to fully cover the cherries.
- Bake: Place the pan in the oven and bake until the top is lightly golden and the filling is bubbly.
- Cool Completely: Allow the bars to cool fully in the pan before adding the glaze.
- Prepare the Glaze: In a small bowl, whisk together powdered sugar, lemon juice, vanilla extract, and heavy whipping cream until smooth.
- Glaze the Bars: Drizzle the glaze evenly over the cooled bars. Let it set before slicing.
Cooling the bars fully ensures clean slices and allows the flavors to settle.
Serving and Storage
Cherry bars are best served at room temperature, where the cookie base is soft and the glaze is set. They can be cut into small squares for sharing or larger pieces for a more indulgent dessert.
These bars pair well with coffee, tea, or a glass of milk. For a more decadent presentation, they can be served with a scoop of vanilla ice cream or a dollop of whipped cream.
For storage, place cherry bars in an airtight container. They can be kept at room temperature for up to two days or refrigerated for up to five days. Refrigeration helps maintain freshness, especially in warmer environments.
If you wish to freeze them, store the bars without glaze in a freezer-safe container. Freeze for up to two months, then thaw and glaze before serving.
Tips
These practical tips can help you achieve the best possible cherry bars:
- Do Not Overbake: Slightly underbaked bars remain soft and chewy.
- Use Parchment Paper: This makes removing and slicing the bars easier.
- Adjust the Glaze: Add cream slowly to control thickness.
- Try Other Fillings: Blueberry or apple pie filling can be substituted.
- Let the Glaze Set: Waiting ensures a neat presentation.
Small adjustments can personalize the recipe while keeping it reliable.
Conclusion
Cherry bars are a timeless dessert that delivers big flavor with minimal effort. The combination of a buttery cookie base, vibrant cherry filling, and smooth lemon glaze creates a treat that is both comforting and eye-catching. Their simplicity makes them accessible, while their taste makes them memorable.
Perfect for celebrations or casual baking days, these bars are sure to become a go-to recipe. With flexible ingredients and straightforward steps, cherry bars offer a satisfying baking experience and a dessert that is always warmly received.
FAQ
Can I use homemade cherry filling?
Yes, homemade filling works well as long as it is thick enough to hold its shape.
Do I have to refrigerate cherry bars?
Refrigeration is recommended for longer storage, but short-term room temperature storage is fine.
Can I make these bars ahead of time?
Yes, they can be baked a day in advance and glazed before serving.
Why is my glaze too thin?
Too much cream can thin the glaze. Add powdered sugar to thicken if needed.
Can I double the recipe?
Yes, simply use a larger pan and adjust baking time as needed.
